

The most reliable path through patellar tendinopathy is a staged progressive loading program: analgesic isometrics first, then heavy slow resistance or eccentric strengthening, then plyometric energy storage training, then a return to sport. Clinical reviews show this framework can take several weeks to a few months to move through, with progression tied to pain scores rather than the calendar, typically requiring several weeks to a few months. It’s backed by BJSports and PMC research, and it’s the same framework applied by many clinicians.
TL;DR:
- Progression through patellar tendinopathy rehab relies on strict pain monitoring, with a VAS score of 3/10 during provocation tests before advancing stages.
- Early stages focus on isometric holds for pain relief, moving to isotonic strength exercises like heavy slow resistance as tolerated, and only then reintroducing plyometric drills.
- Strengthening the hips and calves is essential for long-term tendon health and to prevent stalls in recovery, with consistent accessory work across all stages.
- Exercise execution accuracy, particularly knee position and control during movements, is crucial to avoid reloading the tendon incorrectly and causing setbacks.
- Avoid rushing progression or ignoring symptoms, especially in season, to prevent re-injury; in-person clinical assessment is recommended if pain does not reliably improve.
Knee or hip pain? Start with a $67 new patient visit
A chiropractor assesses the joint, the muscles around it and how you move, and treats it the same day when it is safe. See knee pain care in Calgary. Book online.
Patellar tendinopathy, sometimes called jumper’s knee, responds best to a four-stage rehab model built around one question at every step: how did your tendon respond to that load? This is the structure referenced in the British Journal of Sports Medicine review on progressive tendon loading, and it’s become the backbone of most physical therapy for tendon pain today. You move forward only when your tendon proves it’s ready, not when a program says you should be.
Stage 1: Calm the tendon down with isometrics. The goal here isn’t strength. It’s pain control and rebuilding your tolerance to load without flaring things up. Isometric quadriceps holds, five repetitions of 45 seconds, two to three times a day, are the standard prescription. This dosage comes directly from clinical research showing isometric loading reduces tendon pain for roughly 45 minutes afterward and appears to ease the motor cortex’s inhibition of the quadriceps, a neurological brake that often kicks in when a tendon is irritated. During this phase, you also need to look honestly at your training load. If your knee flares every time you run stairs or play a set of tennis, that activity gets paused or scaled back, not “toughed through.”
Stage 2: Build capacity with isotonic strength work. Once the tendon tolerates daily isometric loading without a pain spike, you move to isotonic strengthening, either heavy slow resistance (HSR) training or a classic eccentric program. HSR uses a controlled tempo, often three seconds on the concentric phase and four on the eccentric, with progressive loading that starts around a 15 rep max and works down toward a 6 rep max over several weeks. Research comparing the two approaches finds HSR produces outcomes similar to eccentric training, often with better patient satisfaction because it’s less painful to perform and doesn’t require a decline board for every session.
Stage 3: Reintroduce energy storage and plyometrics. This is where jumping, hopping, and bounding come back into the picture, carefully and in small doses. Your tendon needs to prove it can absorb and release load quickly, not just under a slow, controlled squat. You don’t earn this stage by feeling better. You earn it by passing objective strength and pain benchmarks.
Stage 4: Return to sport-specific conditioning. The final stage layers in cutting, deceleration, sprinting, and the specific demands of your sport. This is also where most people get impatient and skip ahead, which is exactly how a tendon that was healing gets re-aggravated.
Progression between every stage runs on the same rule: pain during a provocation test, most often a single-leg squat, needs to sit at or below 3 out of 10 on a visual analog scale (VAS) and stay there consistently for about a week before you advance. That threshold comes straight from the BJSports progressive loading protocol, and it’s worth memorizing because it removes the guesswork from “am I ready yet?”
A few notes that matter regardless of which stage you’re in:
Here’s a practical library of exercises for patellar tendon strengthening, organized by stage so you can match the move to where your tendon actually is right now, not where you wish it was.
Isometric leg extension (Stage 1). Sit in a leg extension machine or against a wall with your knee bent to roughly 60 degrees. Push into the pad or hold the position at about 70% of your maximum effort for 45 seconds. Rest one to two minutes and repeat for five total sets, two to three times daily.
Spanish squat (Stage 1). Loop a resistance band around a sturdy post at knee height and step into it so it sits behind your knees, letting you lean back into the band while holding a squat position around 70 to 90 degrees of knee flexion. This targets the quadriceps and tendon directly while taking pressure off the lower back and ankles, making it a favorite in stretching for patellar tendinopathy programs because it isolates the exact structure you’re rehabbing.
Leg press with HSR tempo (Stage 2). Load the leg press to a weight you can control for roughly 15 repetitions, using a three second push and a four second lowering phase. Every session or two, add a small amount of weight and drop the rep target, working toward a 6 rep max over four to six weeks.
Seated knee extension, slow tempo (Stage 2). Same tempo principle as the leg press, isolated to the quad and tendon. Useful when you want a controlled, single-joint option that doesn’t demand as much balance or coordination as a squat variation.
Decline squat, eccentric focus (Stage 2). Stand on a 25 degree decline board and lower slowly into a squat, emphasizing the descent over four seconds, then push back up at a normal pace. The decline angle shifts more load onto the patellar tendon specifically, which is the entire point of this exercise.
Single-leg press or split squat (Stage 2 to 3). Once double-leg strength work is well tolerated, shifting to single-leg variations closes the gap between rehab and real-world sport, where you’re rarely standing on two feet when your knee gets tested.
Calf raises, eccentric tempo (accessory, all stages). A stiff, strong calf absorbs shock that would otherwise transfer up into the knee. Slow, controlled lowering phases here support the tendon indirectly.
Hip abduction and hip extension work (accessory, all stages). Weak hips change how your knee tracks under load. Side-lying leg raises, band walks, and glute bridges belong in every stage of a patellar tendonitis exercise program, not just as an afterthought.
Early on, double-leg variations are usually safer and let you control load precisely. As you clear Stage 2 benchmarks, shifting toward single-leg work builds the strength and stability you’ll actually need for cutting, jumping, and landing.
Technique errors are where a lot of home workouts for patellar tendinopathy go wrong, usually in ways that feel productive but quietly reload the tendon incorrectly.
Isometric leg extension. Keep the knee bent between 30 and 60 degrees, a range that clinical guidance identifies as comfortable while still loading the tendon effectively. A common mistake is locking the knee too straight, which shifts load away from the tendon and toward the joint. Breathe normally throughout the hold. Holding your breath spikes blood pressure for no benefit.
Spanish squat. Keep your shin roughly vertical and your weight settled back into the band rather than forward onto your toes. If your knees are collapsing inward, that’s a hip strength issue to address separately, not something to fix by changing the squat itself.
Decline squat and eccentric loading. Increase difficulty by adding weight (a barbell or dumbbells) before increasing the decline angle. Slow the descent down further before you slow it down and add load at the same time. Stacking two variables at once is how people get hurt.
A sample HSR session might look like this: three to four sets of leg press, starting at a weight you can manage for 15 controlled reps using a three second push and four second lowering phase, performed every second day, with weight added and rep targets dropping toward six reps as strength builds.
If any of these movements provoke pain beyond your VAS 3/10 ceiling, regress before you push through:
Pro Tip: Film your single-leg squat from the front on your phone before and after a session. If your knee is diving inward at the bottom of the movement, that’s usually a hip control issue showing up under fatigue, not a tendon problem, and it’s worth flagging to a clinician.
Two tools do almost all the work here: a pain provocation test (usually a single-leg squat or single-leg decline squat) and the VAS pain scale. Rate your pain immediately after the test on a 0 to 10 scale.
The rule clinical protocols consistently use is this: stay at your current stage until that provocation test consistently scores 3 out of 10 or lower for a full week of regular training. Not one good day. A full week.
Signs you’re ready to progress:
Signs you need to back off, not push forward:
Pro Tip: Keep a simple daily log: one line for your provocation test score, one line for morning pain before you’ve done anything. Patterns across a week tell you far more than how any single day feels.
If pain rises during a heavy training block or in-season competition, it’s often smarter to drop back toward Stage 1 isometrics temporarily rather than force through Stage 2 or 3 work. Isometrics manage symptoms without asking the tendon to do the heavy lifting that a flare-up can’t yet handle.
A patellar tendon rarely fails in isolation. Weak hips change how force travels down the leg, and a stiff or underprepared calf leaves the knee absorbing shock it wasn’t designed to handle alone. Neglecting hip and calf strengthening is one of the more common reasons a tendon rehab program stalls despite good tendon-specific work.
Build these into your week without overloading the same tissue every day:
Schedule accessory work on alternate days from your primary tendon-loading sessions, or immediately after them, so you’re not asking already-fatigued muscles to stabilize a heavy tendon session the next day.
Getting back to sport means proving your tendon can store and release energy quickly, not just tolerate slow, controlled load.
Clinical benchmarks before advancing through this sequence typically include demonstrated single-leg strength, such as tolerating a single-leg press at a meaningful percentage of body weight, alongside a provocation test that stays comfortably under your VAS threshold through the increased demand. If you want more structured drill progressions for this phase, plyometric training guides for athletes offer useful variations to layer in once you’ve cleared the basics.
Adjuncts have a role, but it’s a supporting one, not a solution. Kinesiology taping and strapping can reduce pain enough to let you keep training through a rehab program, particularly useful for in-season athletes who need to keep competing while still progressing through stages.
NSAIDs and steroid injections work similarly: they offer short-term relief but don’t rebuild the tendon’s capacity to handle load, and masking pain that’s actually signaling overload can lead you to push through damage rather than respecting it.
A structured exercise program resolves most cases of patellar tendinopathy, but some situations call for hands-on assessment, particularly when pain plateaus despite consistent, well-executed loading. Some clinics combine manual therapies like Active Release Technique with shockwave and laser modalities to address soft tissue restrictions that a home program alone can’t reach.
If you book a visit, bring the details that let a clinician actually help you:
Written with input from Deane, drawing on the staged rehabilitation literature referenced throughout this guide.
A written program helps, but a tendon that isn’t responding the way it should often needs eyes on it. Shephardhealth’s treatments for soft tissue injuries combine assessment with hands-on techniques designed to complement, not replace, the loading work outlined above. If you’re not sure which stage you’re actually in, or your pain isn’t following the pattern it should, book a first visit and bring your training log. It gives us the clearest picture of what your tendon needs next.
Most patellar tendinopathy content online overcomplicates the exercise selection and underexplains the progression rules, which is exactly backward. The specific exercise you choose (Spanish squat versus decline squat, leg press versus seated extension) matters far less than whether you’re honestly applying the VAS 3/10 threshold before moving forward. I’d argue the single biggest failure point isn’t picking the wrong movement. It’s impatience: skipping ahead because a knee feels fine on a good day, then wondering why symptoms return two weeks into Stage 3.
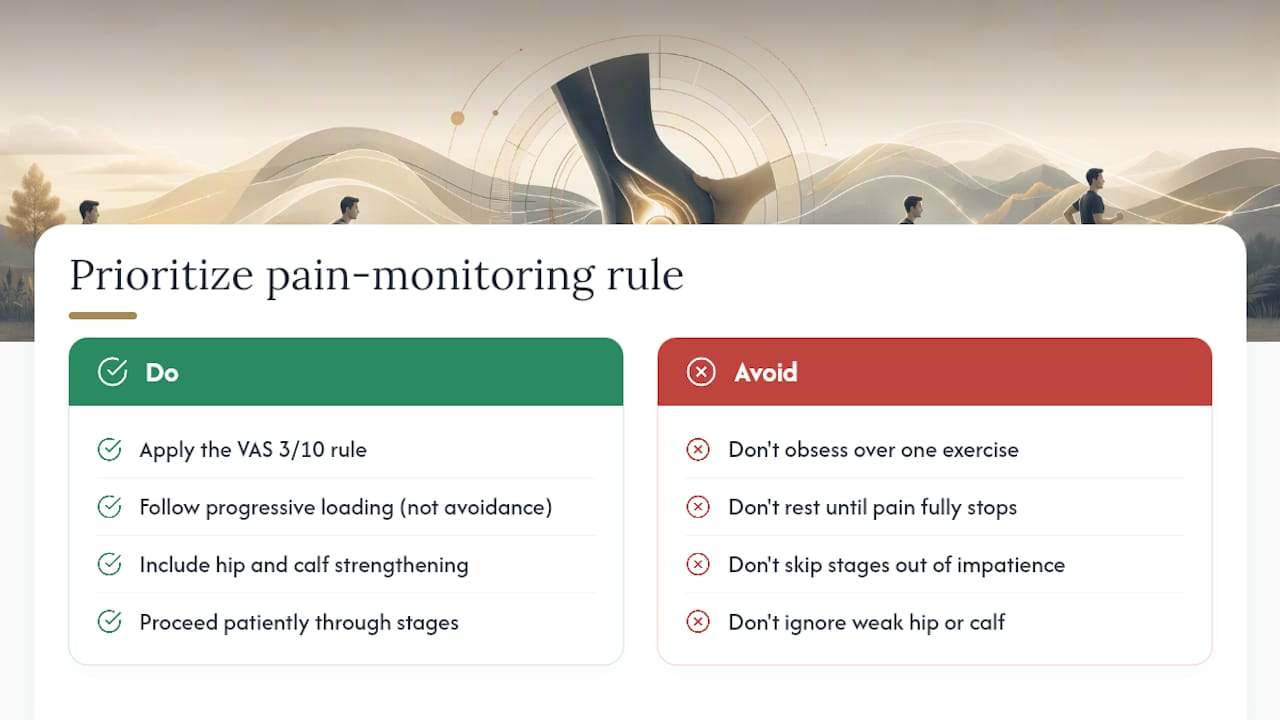
The conventional advice to “rest until it stops hurting” has been outdated for years, and the research is clear that progressive loading, not avoidance, rebuilds tendon capacity. What’s underemphasized is how much hip and calf work matters here. Plenty of people grind through leg extensions and decline squats for months while ignoring a weak hip that’s quietly overloading their knee on every single step.
If you take one thing from this guide, make it the pain-monitoring rule, not the exercise list. Get that right, and the exercises mostly take care of themselves.
— Deane
This article is general information, not a substitute for advice from a qualified doctor. Consult a qualified healthcare professional about your own circumstances before acting on anything here.
There’s no shortcut that beats consistent, staged loading. Progress through isometrics, then HSR or eccentric strengthening, then plyometrics, advancing only when your provocation test pain stays at 3/10 or lower for a week. Rushing stages tends to prolong recovery, not speed it up.
No single exercise wins outright. Isometric leg extensions and the Spanish squat lead early, while heavy slow resistance work on the leg press or decline squat drives strength gains in the middle stages of a patellar tendon strengthening program.
Most cases improve substantially with a consistent staged loading program, though some tendons remain sensitive to spikes in training load even after recovery. Ongoing accessory strength work for the hips and calves helps reduce the chance of recurrence.
It’s rarely dangerous, but ignoring it or pushing through worsening pain can extend recovery from months into years. Early, structured intervention with isometrics and progressive strengthening gives you the best odds of a full return to sport.
Same Day Appointments Available
We Direct Bill!