

A phased home program that moves from gentle mobility to scapular control to low-load band strengthening to functional tasks restores pain-free movement for many people with nonoperative rotator cuff problems, as long as you progress within your pain tolerance. Stop and get checked by a clinician if you notice sharp pain, sudden weakness, numbness, fever, or real swelling. Keep reading for the exact exercises, reps, and timelines we recommend to our own patients.
TL;DR:
- Progression from gentle mobility exercises to functional task training is safe as long as pain remains mild and manageable, without sharp discomfort.
- Key early movements include pendulum swings, wall walks, and passive rotation stretches, performed with careful attention to pain signals and technique.
- Strengthening involves scapular stabilization, band-resisted external and internal rotation, and gradually increasing resistance based on pain-free progress.
- Home programs last about four to six weeks, with adherence supported by tracking symptoms and avoiding resistance increases before movement quality improves.
- Clinician assessment is recommended if pain is severe, persistent, or follows injury, to tailor the program and monitor for red flags like sudden weakness or swelling.
Shoulder, arm or wrist pain? Start with a $67 new patient visit
A chiropractor assesses the joint, the muscles and the neck and upper back that feed it, and treats it the same day when it is safe. See shoulder and arm care in Calgary. Book online.
A few minutes of preparation protects your shoulder and makes every exercise more effective. Warm up for 5 to 10 minutes with light arm circles or a brisk walk before stretching: motion-first warming increases blood flow to the rotator cuff tendons and makes the tissue more pliable before you ask it to stretch or contract.
You don’t need much equipment to start:
Follow one simple pain rule throughout every phase: mild discomfort that settles within a few minutes is acceptable, but sharp, stabbing, or worsening pain means you stop that exercise. According to AAOS OrthoInfo’s rotator cuff conditioning program, mobility and stretching work is typically done most days of the week, while strengthening exercises are usually performed several days weekly over a program lasting a few weeks.
Pro Tip: Keep a simple notebook by your bed and jot down your pain level after each session so you can spot patterns before they become setbacks.
Clinician clearance matters most if your pain started after a fall or forceful injury, if you cannot lift your arm away from your side at all, or if you’ve already had shoulder surgery. In those cases, talk to a physical therapist or your doctor before starting any of the exercises below.
Early rehab is about restoring motion without forcing it. Your shoulder needs movement, but only the amount it can accept without a pain flare.
MedlinePlus patient instructions list these same mobility and stretching movements as a standard starting point, with a reminder to check your technique with a provider before progressing.
Pro Tip: If a stretch feels sharp rather than mildly uncomfortable, back off the range slightly rather than pushing through it.
Once motion feels more comfortable, your focus shifts to waking up the muscles that stabilize your shoulder blade and rotator cuff before adding real load.
Patient-facing rehab guidance describes this same sequence, moving from stretching into resisted band work once motion is comfortable.
Progress by increasing reps first, then sets, and only then resistance band tension, and always check how your shoulder feels the next morning before adding more.
Pro Tip: A common mistake is jumping to a heavier band before movement quality is clean; keep the motion controlled and symptom-free before you size up.
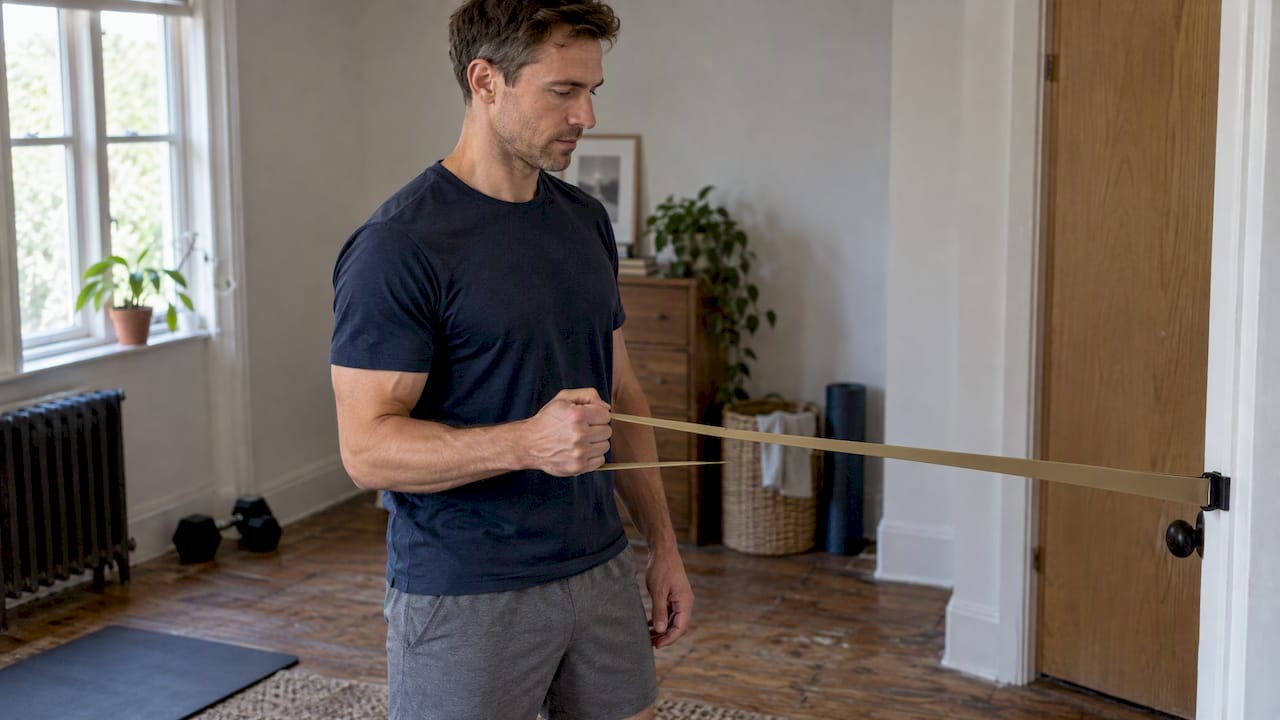
Once your shoulder tolerates band strengthening without next-day soreness, it’s time to build the strength and control you’ll need for daily tasks or sport.
If progress stalls or pain returns as you add load, that’s a signal to shift back to therapist-supervised programming rather than pushing through on your own.
Good progression follows a few consistent rules. Prioritize movement quality over speed: increase repetitions before sets, and sets before resistance, checking your symptoms the next day before advancing further.
The AAOS OrthoInfo program outlines dosing such as pendulums for 2 sets of 10, passive stretches for 4 reps, and standing rows for 3 sets of 8 performed three days a week, with band rotations done in 3 to 4 sets. A structured program following this kind of dosing typically runs 4 to 6 weeks, which gives tendons and scapular stabilizers enough time to adapt before you add real functional load.
Watch for these warning signs, which call for prompt clinician assessment rather than continued home exercise:
The GRASP trial found that progressive, individually tailored exercise with periodic physiotherapist check-ins improved outcomes and adherence, partly through simple tools like an exercise diary. Keeping your own log of reps, resistance, and next-day symptoms gives you and any clinician you see a clear record to work from.
The phased approach above draws on several recognized clinical sources rather than one opinion. The AAOS OrthoInfo rotator cuff program provides the exercise sequence and dosing referenced throughout this program. The GRASP trial supports progressive, supervised exercise programs, with up to six physiotherapist sessions over 16 weeks structured around progression and adherence support, while also finding that simpler best-practice advice works well for many patients.
The bottom line across these sources: home programs genuinely help many people, but clinician tailoring improves both safety and speed of recovery.
In our experience, the patients who recover fastest start with an assessment that confirms what they’re actually dealing with, since tendinopathy, a partial tear, and a full-thickness tear all call for different pacing. From there, a simple exercise diary and small, steady progressions beat ambitious jumps every time. The most common misstep we see is adding resistance before movement quality is clean, so slow down and earn each progression.
— Deane

If your shoulder pain hasn’t settled with home exercises, or if you’d rather have a professional eye on your progressions from the start, that’s exactly where support from a healthcare team can help, often using an advanced isokinetic dynamometer system for objective strength and range of motion testing. Such support often begins with a thorough assessment of shoulder movement, strength, and specific injury pattern, then builds an individualized plan rather than a generic handout.
If your symptoms match any of the red flags above, or you simply want supervised progression, visit our shoulder and rotator cuff treatment page to book an assessment.
This article is general information, not a substitute for advice from a qualified doctor. Consult a qualified healthcare professional about your own circumstances before acting on anything here.
Start with gentle pendulum swings and wall walks to restore motion, then add scapular squeezes and light band rotations once movement feels comfortable, following a patient instruction sequence like the one outlined above. Progress reps before resistance and stop any exercise that causes sharp pain.
Mild discomfort that fades within a few minutes is generally fine to work through, but sharp or worsening pain means you should stop that exercise. The Canadian clinical guideline recommends exercise following a proper clinical assessment rather than pushing through significant pain on your own.
Consistent, progressive exercise, like the structure used in the GRASP trial, supports recovery better than rest alone for many nonoperative cases. Keeping an exercise diary and checking in periodically with a physiotherapist also improves adherence and outcomes.
Exercise can restore strength and function for many tendinopathies and partial tears without surgery, but a full-thickness tear is a structural injury that exercise alone does not close. The Canadian guideline reserves surgery for selected full-thickness tear cases after proper assessment.
Same Day Appointments Available
We Direct Bill!