

Targeted core stabilization exercises and gentle, neutral-spine stretches are the safest and most effective way to reduce pain and improve stability for most people with spondylolisthesis. The key is training the deep spinal muscles without extending or overloading the lower back. If numbness, weakness, or pain worsens at any point, stop the exercise and see a physical therapist for guidance before continuing.
TL;DR:
- Spondylolisthesis exercises should focus on strengthening deep core muscles, particularly the multifidus and transversus abdominis, without overloading or extending the lower back.
- Exercises like pelvic tilts, bird dogs, bridges, dead bugs, and modified planks help maintain a neutral spine and improve neuromuscular activation, which is crucial for stability.
- Activities involving lumbar extension, such as backbends, deep sit-ups, heavy lifting, or high-impact sports, should be avoided until cleared by a clinician to prevent worsening of the slip.
- Seek professional guidance if symptoms worsen, nerve involvement appears, or no improvement occurs after consistent effort to ensure safe progression and proper exercise technique.
Before jumping into any spondylolisthesis workout, it helps to understand what you’re actually training. Spondylolisthesis happens when one vertebra slips forward over the one below it, and that instability puts extra demand on your deep core muscles, particularly the multifidus and transversus abdominis, to keep your spine from moving in ways that aggravate the slip. Strengthening those muscles, rather than your visible six-pack muscles, is the real goal of spondylolisthesis rehabilitation exercises.
Here are five foundational movements used in clinical spondylolisthesis physical therapy programs, listed from easiest to more demanding:
Every one of these exercises depends on finding and holding a neutral spine, not an arched one and not a flattened one, then bracing your core without holding your breath. This is what clinicians call neuromuscular re-education, and it’s arguably more important than raw strength because poor activation timing can leave the spine unprotected even when the muscles themselves are strong enough.
Pro Tip: Place two fingers just inside your hip bones before you brace. You should feel a gentle firming under your fingers, like tightening a corset, not a hard clench and not your breath catching in your chest. If you can talk normally while holding the position, you’re bracing correctly instead of just holding your breath.
The best stretches for spondylolisthesis target the muscles that pull your pelvis out of a neutral position when they’re tight. Tight hip flexors tilt your pelvis forward, which increases the forward slip stress on your lower spine. Tight hamstrings do something similar by pulling on the pelvis from below, flattening your natural lumbar curve in ways that can aggravate symptoms during daily movement.
If any stretch causes sharp pain rather than a mild pull, shorten the range or stop. Kneeling stretches can be done seated instead if your knees or lower back protest the position.
Early in recovery, some common exercises do more harm than good. The biggest culprit is anything that pushes your spine into extension, meaning an arched, backbend-style position, because extension increases the shear forces across the slipped vertebra and can worsen the slippage over time.
Movements and activities to avoid until a clinician clears you include:
Rehabilitation guidelines built around these precautions consistently pair avoiding extension and axial loading with core activation work in the earliest phase of care, rather than treating strength and safety as separate concerns.
Certain symptoms mean you should stop exercising and seek care the same day rather than waiting to see if things improve on their own. Watch for new or worsening leg weakness, numbness that spreads or intensifies, or any change in bowel or bladder function. Those signs point to nerve involvement that self-directed spondylolisthesis pain relief exercises cannot address, and they need prompt clinical evaluation.
Recovery follows a phased structure, and knowing the benchmarks ahead of time keeps you from progressing too fast or stalling too long in one stage.
Progress by increasing hold time before adding reps, moving from knees to toes on planks, and only then introducing light resistance. Pause any progression that brings pain back.
Pro Tip: Track your plank hold time weekly instead of daily. Day-to-day fluctuation is normal, but a steady weekly climb toward 60 seconds tells you the program is working.
Self-guided exercise works for many people, but certain situations call for hands-on assessment before you continue. Book a visit if you notice any of the following:
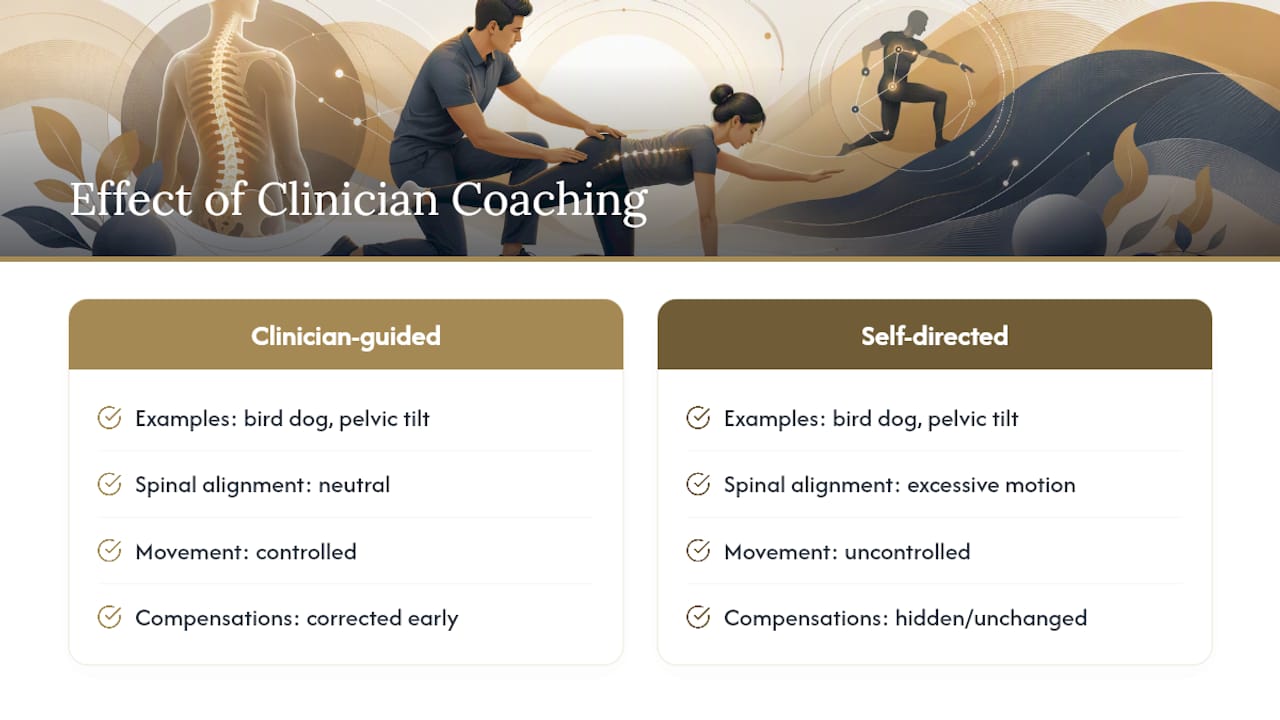
A physical therapist or chiropractor provides hands-on neuromuscular coaching, corrects compensations you can’t see in a mirror, and coordinates imaging or referral when your case needs more than a home program offers.
A specialized chiropractic and physical rehabilitation practice provides clinician-backed exercise plans built around each patient’s specific slip severity and symptoms. The practice uses non-invasive tools, including spinal decompression, laser therapy, and Active Release Technique, alongside same-day appointments and direct insurance billing.
Hands-on coaching matters because most people perform exercises like bird dog or pelvic tilt with hidden compensations that reduce their benefit and, in some cases, increase risk. Correcting those patterns early shortens recovery and builds a program you can trust.
Bring these resources to your next appointment so you and your clinician are working from the same playbook: the nonsurgical treatment overview from Spine-Health, the exercise guide from MyHealth Alberta, the Sanford Health rehabilitation guideline, and a PubMed review on spinal rehabilitation for the underlying evidence base.
If you’ve read this far, you already know the exercises. What most people actually get wrong isn’t the movement selection, it’s the sequencing. They jump to planks and bridges before they can even find a neutral spine, then wonder why progress stalls or pain flares.
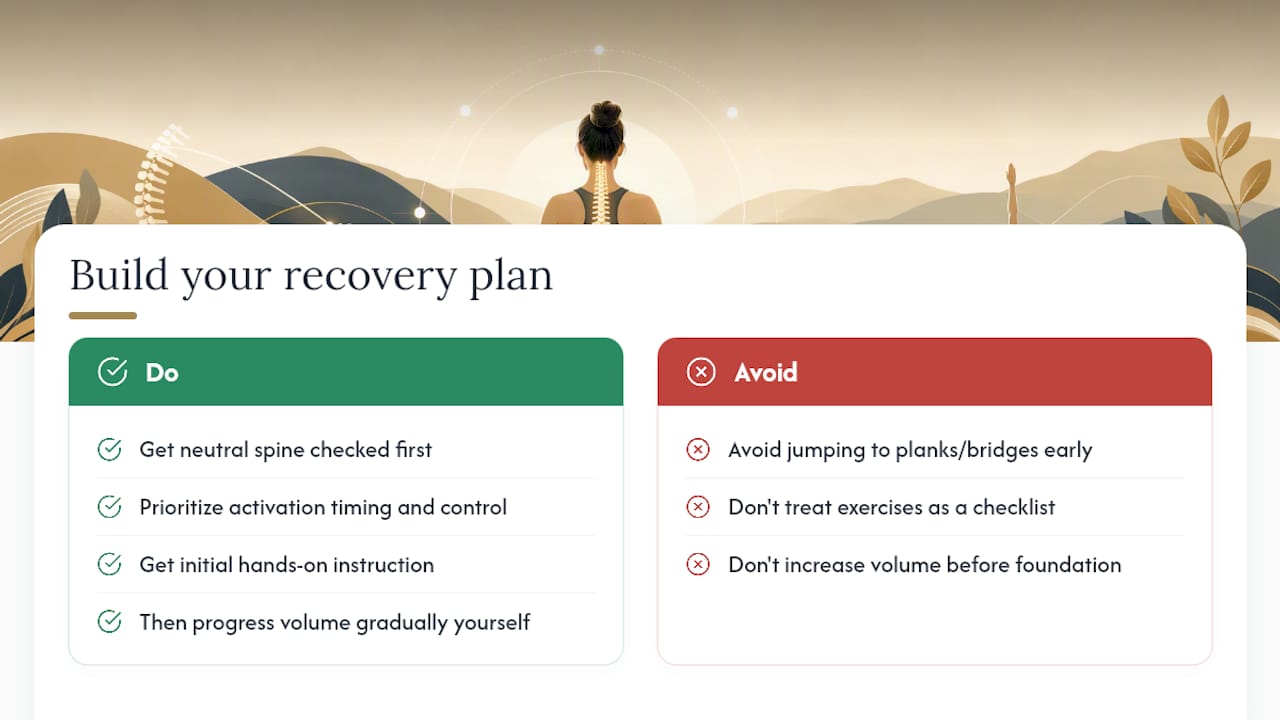
The conventional advice treats spondylolisthesis exercises like a checklist: do these five things and you’ll feel better. That undersells how much timing and activation quality matter. Two people doing an identical bird dog can get completely different results depending on whether their deep stabilizers fire first or their lower back compensates instead. That distinction is exactly why an initial round of hands-on instruction pays off, even for people who plan to manage most of their program independently afterward.
Prioritize this first: get your neutral spine position checked by someone qualified before you build volume. Everything else, reps, holds, progression speed, is easier to self-correct once that foundation is solid. If you’re ready for that kind of guidance, find out what a first chiropractic visit looks like at Shephard Health.
— Deane
This article is general information, not a substitute for advice from a qualified doctor. Consult a qualified healthcare professional about your own circumstances before acting on anything here.
Same Day Appointments Available
We Direct Bill!