

For most shoulder pain, a 5 cm clinical-grade elastic kinesiology tape applied as a supraspinatus Y-strip covers rotator-cuff irritation, while a deltoid I or Y pattern handles diffuse shoulder pain and stiffness. The quick workflow is the same for both: clean and dry your skin, apply the anchor at 0% tension, lay the middle zone with 25–50% stretch, set the end anchor at 0%, then rub the tape firmly for 30 seconds to activate the adhesive. A Frontiers 2025 meta-analysis confirms consistent short-term gains in range of motion and function. making kinesio taping shoulder a practical adjunct to your rehab plan rather than a standalone cure.
Do not tape over open wounds, active skin infections, uncontrolled swelling, or areas of compromised circulation. If you have severe instability, progressive numbness, or worsening weakness, skip DIY taping and book a clinical assessment at Shephardhealth before proceeding.
Getting your supplies right before you start saves you from a strip that peels off in two hours. The standard tape width for shoulder applications is 5 cm; narrower tape does not cover enough surface area to support the deltoid or supraspinatus effectively.
| Item | Purpose | Recommended Format |
|---|---|---|
| Clinical-grade elastic kinesiology tape | Core therapeutic medium | 5 cm roll or pre-cut shoulder kit |
| Blunt-tip scissors | Cutting Y or I strips cleanly | Standard craft or medical scissors |
| Alcohol wipes or soap and water | Removing skin oils so adhesive bonds | Single-use wipes preferred |
| Optional adhesive primer spray | Extends wear on oily or sweaty skin | Light application, let dry fully |
| Single-use razor | Trimming heavy body hair before taping | Disposable, used once |
Uncut roll vs. pre-cut shoulder kit. An uncut roll lets you create custom Y, I, or X shapes matched to your anatomy, which is useful when your shoulder proportions are outside average. Pre-cut shoulder kits from brands like KT Tape and Kinesio offer consistent shapes and are faster to apply, making them a reliable starting point if you are new to self-application. The trade-off is that pre-cut pieces assume a standard shoulder width; if the Y-split legs land off your anatomical landmarks, the mechanical effect is reduced.
Skin prep, step by step. Clean the skin with soap and water or an alcohol wipe, then let it dry completely. Trim any heavy hair with a razor. Round the corners of each strip with scissors before applying — square corners catch on clothing and lift within hours. If you have never used kinesiology tape before, apply a 2 cm test strip to the inside of your forearm and leave it for 24 hours to check for adhesive sensitivity before committing to a full shoulder application.
You can buy tape at most pharmacies, sporting goods stores, or online. If your skin is fragile, you have a known adhesive allergy, or your injury involves significant instability, clinic-applied tape from a trained practitioner is the safer and more reliable option. Practical application guidance from clinician-led sources consistently emphasizes that correct pre-stretch of the target tissue and friction-rub activation are the two technical details that most determine how long a strip lasts.
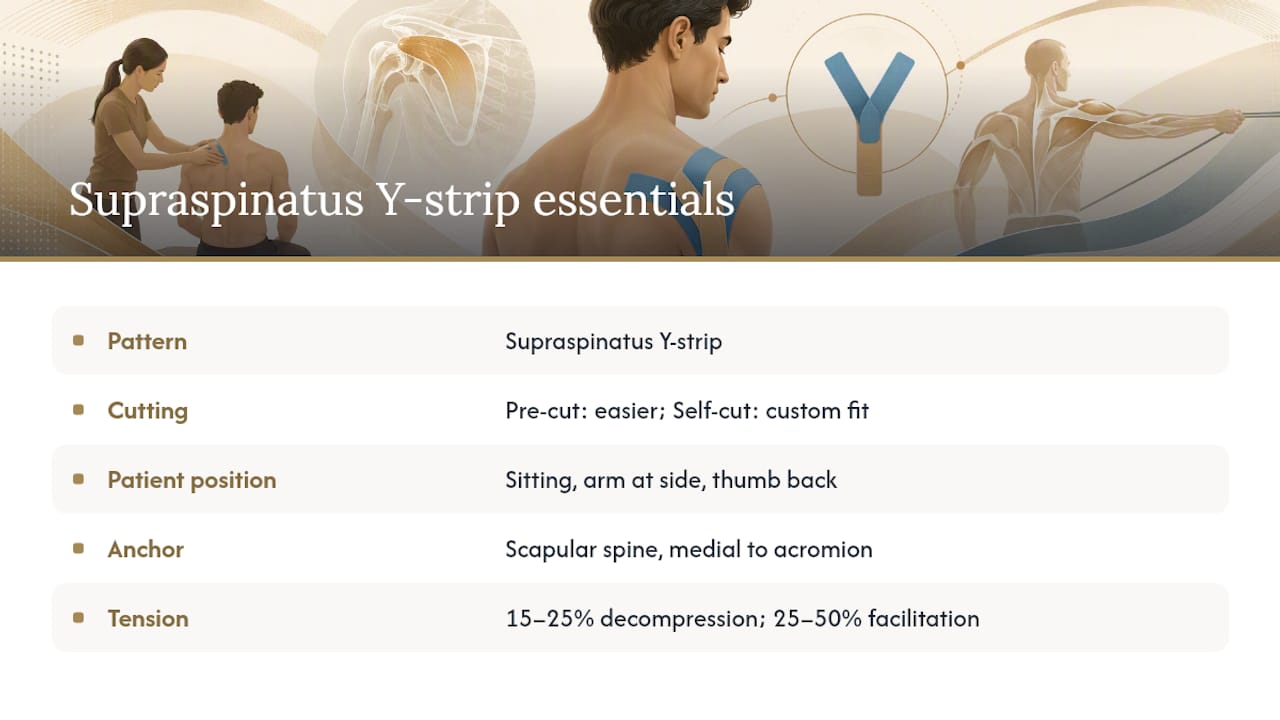
A supraspinatus Y-strip is the go-to pattern for rotator cuff irritation and reduced pain-free abduction. A JOSPT double-blinded clinical trial found immediate improvements in pain-free shoulder abduction following therapeutic KT application, which is why this pattern is often the first choice in a clinical setting.
Pre-cut kit or self-cut Y-strip? Pre-cut shoulder kits from KT Tape or Kinesio are consistent and easy to apply correctly on the first attempt. A self-cut Y-strip gives you a custom fit if your shoulder is larger or the pre-cut legs do not reach your anatomical landmarks cleanly.
Patient positioning. Sit upright and let your arm hang at your side, then internally rotate slightly (thumb pointing back). This position places the supraspinatus on a mild stretch, which is exactly where you want the tape to land.
Anatomical landmarks. The anchor sits at the scapular spine or upper trapezius, just medial to the acromion. The two Y-legs travel over the supraspinatus and wrap toward the greater tuberosity of the humerus. If you press gently on the top of your shoulder and feel the bony ridge of the acromion, the tape should cross just below it.
Tension for this application. Use 15–25% tension for subacromial decompression (the tape lifts the skin slightly, creating space). Use 25–50% for neuromuscular facilitation if you want the tape to cue muscle activation during movement. A three-arm RCT showed that adding kinesio tape to a therapeutic exercise program produced better outcomes for pain and disability than exercise alone, so pair this application with active range-of-motion exercises rather than resting the shoulder completely.
If pain increases after taping or your range of motion worsens within the first hour, remove the tape and consult a clinician before reapplying.
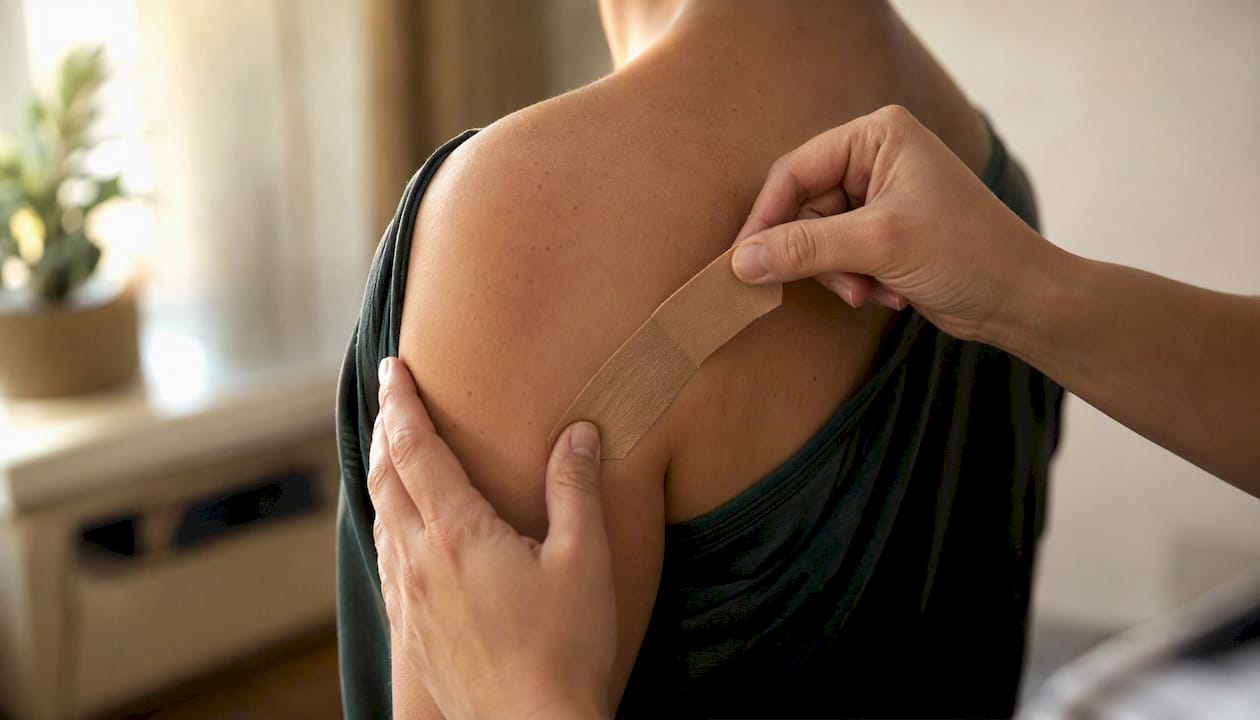
Clinically applied kinesiology tape is commonly worn for a short duration of a few days. Check your skin at 24 hours after the first application; if you see redness, blistering, or feel persistent itching, remove the tape immediately rather than waiting for the full wear period. Medical guidance on KT tape wear time consistently places the upper limit at 5 days, after which adhesive properties decline and skin irritation risk rises.
Several factors shorten effective wear time: heavy sweating, oily skin, hot showers, and any tape edge that was not rounded before application. Showering is fine, but pat the tape dry rather than rubbing it. Avoid soaking in a bath or pool for extended periods.
Safe removal. Support the skin around the tape edge with one hand and peel the tape back on itself slowly, parallel to the skin rather than pulling it away at an angle. If the tape resists, apply a small amount of baby oil, coconut oil, or a commercial adhesive remover to the edge and wait 60 seconds before continuing. Never rip the tape off quickly, especially on fragile or sun-exposed skin.
If you develop a rash, blistering, or skin breakdown after removal, do not reapply tape until the skin has fully healed. Persistent skin reactions warrant a clinician review to rule out a contact allergy to the acrylic adhesive.
The honest answer: kinesiology tape works best as an adjunct to exercise and rehabilitation, not as a standalone treatment. The Frontiers 2025 meta-analysis of randomized trials found consistent short-term improvements in range of motion and upper-limb function, with mixed results for pain and notable heterogeneity across studies. A PubMed systematic review reported large effect sizes for disability and ROM when KT was added to conservative care, though treatment fidelity across studies was often low, which limits how confidently those numbers can be applied to any individual.
| Outcome | Typical Effect | Clinical Meaning |
|---|---|---|
| Range of motion | Consistent short-term improvement | Useful for early loading and exercise tolerance |
| Upper-limb function | Consistent short-term improvement | Supports return to daily activity during rehab |
| Pain | Mixed results across trials | Modest benefit; not reliable as primary pain control |
| Long-term outcomes | Limited evidence | KT alone does not produce durable changes |
One randomized controlled trial found kinesiology tape comparable to NSAIDs as an adjunct to exercise for rotator cuff impingement, with patients showing higher compliance with taping than with oral medication. A separate systematic review concluded that KT has insufficient evidence as a standalone therapy but shows meaningful benefit when paired with exercise. The practical takeaway: use kinesiology tape to manage symptoms, improve your tolerance for early loading, and support your range of motion while you work through a structured rehab plan. It is one tool among several, and it works best when the protocol is consistent and the application is accurate. For a deeper look at the evidence, Shephardhealth’s evidence review covers the clinical studies in more detail.
Avoid kinesiology tape entirely if you have open wounds, active skin infections, deep vein thrombosis concerns, or compromised circulation in the affected limb. These are absolute contraindications, not judgment calls.
Patch-test method. Cut a 2 cm strip of tape and apply it to the inside of your forearm. Leave it for 24 hours. If you see redness, raised skin, or feel itching beyond mild initial awareness, you have adhesive sensitivity and should not proceed with a full shoulder application. Some people tolerate one brand’s adhesive better than another, so switching tape brands is worth trying before abandoning the approach entirely.
Groups that need clinician oversight before self-taping:
Fragile or thin skin (common in older adults or those on long-term corticosteroid therapy) tears more easily during removal and is more prone to blistering under sustained adhesive contact. Diabetes with peripheral neuropathy reduces your ability to detect early irritation under the tape, making regular skin checks critical. A known adhesive allergy requires a clinician to identify a latex-free or hypoallergenic tape option before any application.
Seek urgent medical attention if you notice rapid swelling, spreading redness beyond the tape edges, or new numbness after application. These signs suggest a reaction that goes beyond normal skin sensitivity.
For athletes managing recurring shoulder issues alongside a broader injury prevention program, the injury prevention guide for tactical athletes offers useful context on how taping fits into a longer-term load management strategy.
Kinesio taping shoulder works best as a short-term adjunct to exercise and rehab, using a 5 cm elastic tape with anchors at 0% tension and middle-zone stretch matched to your clinical goal.
| Point | Details |
|---|---|
| Choose the right tape width | Use 5 cm clinical-grade elastic tape for all standard shoulder patterns. |
| Anchors always at 0% tension | Tension on anchor edges causes skin irritation and early peeling; keep them flat. |
| Match middle tension to your goal | Use 15–25% for decompression, 25–50% for support, 50–75% for mechanical stability. |
| Wear 1–5 days, check at 24 hours | Remove sooner if redness, itching, or blistering appears; do not exceed 5 days. |
| Shephardhealth for hands-on care | Clinician-applied taping at Shephardhealth integrates accurate landmarking with a full rehab plan. |
The conventional view of kinesiology tape is that it works by physically holding a joint in place. Most experienced clinicians see it differently. The primary value in a clinical setting is proprioceptive cueing — the tape changes what your nervous system feels during movement, which can reduce guarding, improve motor recruitment, and allow you to tolerate loading that would otherwise feel threatening to the joint. That neurological effect is often more significant than any mechanical support the tape provides.
A typical workflow at a clinic like Shephardhealth starts with a movement assessment to identify which tissues are irritated and which motor patterns are compensatory. The clinician then applies tape during the visit, checks range of motion immediately after, and uses that response to confirm or adjust the pattern. The tape goes home with the patient as part of a broader plan that includes specific exercises and a follow-up date. For rotator cuff rehab, a Y-strip over the supraspinatus is often paired with progressive strengthening in the scapular plane. For an acute AC-joint flare, a cross-strip provides short-term comfort while graduated load avoidance protects the joint during the first 48–72 hours.
What this means practically: if you apply tape at home and feel no change in your movement quality or pain within the first 30 minutes, the pattern or tension is likely off. Tape that is working tends to produce a noticeable shift in how the shoulder feels during the first active movement after application. That feedback loop is much easier to calibrate with a clinician present than alone in front of a mirror. For a broader look at how kinesio taping fits into sports injury treatment, Shephardhealth’s clinical overview explains the protocols used in practice.
Persistent shoulder pain that does not respond to home taping usually means the underlying pattern has not been identified correctly. Shephardhealth provides hands-on shoulder assessments that pinpoint the specific tissues involved, followed by clinician-applied kinesiology taping with accurate anatomical landmarking and tension calibrated to your presentation. That precision matters most when your skin is sensitive, your instability is significant, or your symptoms keep returning despite correct home application.

Taping at Shephardhealth is integrated with a full rehabilitation plan that can include Active Release Technique, laser therapy, and a progressive exercise prescription, so you are not just managing symptoms but addressing what caused them. The clinic offers direct insurance billing and same-day appointments for patients who need prompt assessment. If you have been taping your shoulder at home and your pain or range of motion has not improved after a week, the next step is a clinical evaluation. Book your shoulder assessment at Shephardhealth and get a taping protocol built around your specific anatomy and goals. You can also explore the full range of soft tissue injury treatments available at the clinic to understand what a complete recovery plan looks like.
This article provides general educational information about kinesiology taping techniques. It is not a substitute for professional medical advice. Confirm your specific situation with a qualified clinician before beginning any taping or rehabilitation program.
Same Day Appointments Available
We Direct Bill!